You’re about to learn how to lay asphalt like a pro! Don’t worry, it’s not as daunting as it seems. With the right tools, materials, and a bit of patience, you’ll master this skill in no time.
We’ll guide you through each step, from preparing the surface to applying the asphalt, smoothing techniques, and post-application care.
Let’s avoid common mistakes and get your asphalt looking smooth and professional.
Let’s dive in!
Understanding the Basics of Asphalt
Before you can successfully lay asphalt, it’s crucial that you understand the basic components and properties of this versatile material. Asphalt, often called bitumen, is a sticky, black, highly viscous liquid or semi-solid form of petroleum which acts as a binder for the other ingredients of this material. Asphalt installation is primarily used for road construction, driveways, and parking lots where it’s mixed with aggregate particles to create asphalt concrete.
You see, the foundation of any asphalt project is the grade and mixture of the paving material. This concoction typically consists of crushed rock, sand, and asphalt cement- a sticky substance derived from crude oil. When these components are heated and blended together, they form a hot mix asphalt. This mixture needs to be hot during application, so it’s malleable and can firmly bind together when cooled.
Now, it’s equally important to understand asphalt’s properties. It’s waterproof, flexible, durable, and adhesive- properties that make it ideal for roads. However, it’s also sensitive to temperature changes. It can soften in extreme heat and become brittle in cold temperatures. So, you need to consider the weather when planning your asphalt project.
Learning about asphalt’s components and properties won’t just help you lay it correctly, but it’ll also help you maintain it properly. So, dive in, and learn all you can before you begin.
Necessary Tools and Materials
While you’re gathering knowledge about asphalt, it’s equally important to know the necessary tools and materials needed for laying asphalt successfully. Here’s what you’ll need:
1. Asphalt
This is the primary material. It comes in different types, like hot mix, warm mix, or cold mix, depending on your project’s requirements and the weather conditions in your area.
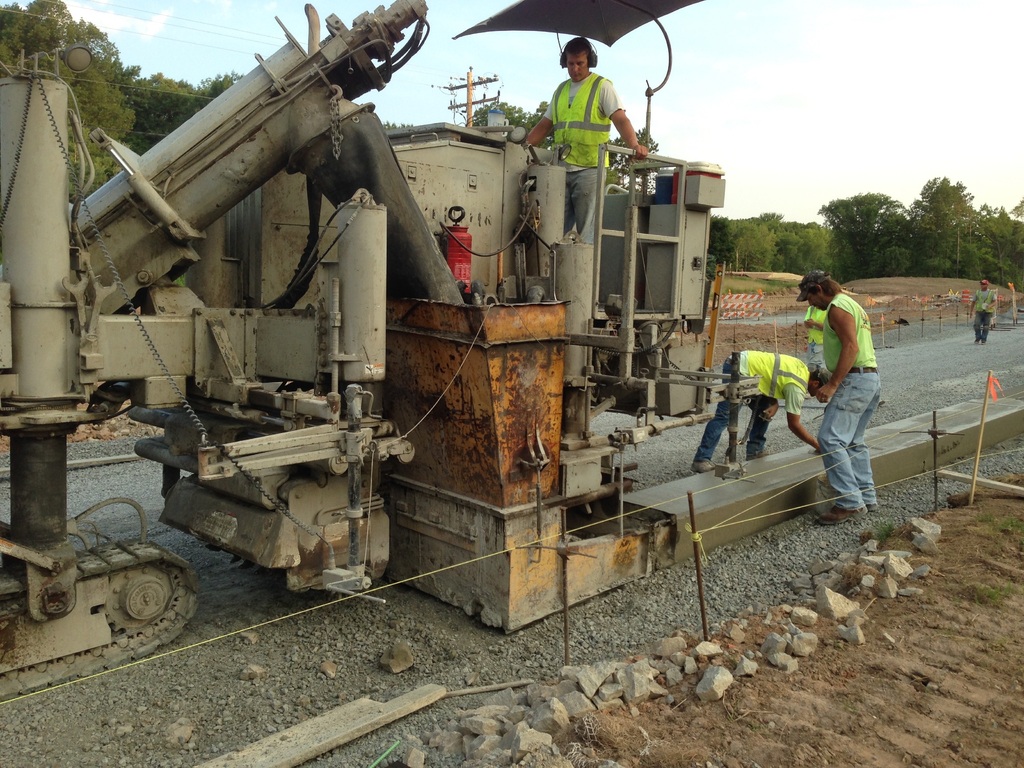
2. Asphalt spreader
This machine evenly distributes the asphalt over the surface. It ensures a smooth and consistent layer, a crucial aspect of a well-laid asphalt road or driveway.
3. Roller machine
Once the asphalt is spread, a roller machine is used to compact it, making it firm and durable.
In addition to these, you’ll also need safety gear like gloves, safety glasses, and sturdy footwear. It’s also advisable to have a shovel and a broom on hand for any minor corrections or clean-ups needed during the process.
Remember that laying asphalt isn’t just about having the right materials but also about using them correctly. Each step in the process is crucial to ensure a well-done job. So, make sure you’re well-prepared before you start.
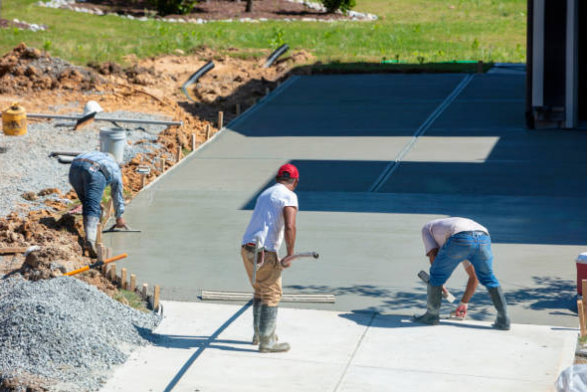
Preparing the Surface for Asphalt
You’ve got your tools and materials ready, and now you need to focus on preparing the surface for asphalt. Start by cleaning the area thoroughly. Remove any debris, rocks, or vegetation that could interfere with the asphalt’s smooth application. It’s crucial not to overlook this step, as any leftover debris can lead to an uneven surface or cause damage in the long run.
Next, you’ll want to level the ground or the sub-base by compacting it or by doing a proof roll with a heavy truck. If there are any uneven spots or slopes, you’ll need to fill them in with gravel or soil. After filling, compact the area using a plate compactor. This process ensures stability and a solid base for the asphalt.
Finally, consider the water drainage situation. Water pooling can damage your new asphalt surface. So, make sure the surface slopes slightly away from buildings and towards a suitable drainage area. If necessary, you may need to install a French drain to manage water effectively.
Applying the Asphalt Correctly
After you’ve prepped the surface, it’s critical that you apply the asphalt correctly, otherwise you could end up with a surface that’s uneven and prone to damage. It’s not just about dumping the asphalt and spreading it around; you have to be precise and meticulous.
Here are the three critical steps:
1. Pouring the Asphalt
Begin by pouring the hot asphalt onto the surface. It’s essential to keep a steady hand and maintain an even distribution. Don’t rush this process; the smoother the initial pour, the better the final result.
2. Spreading the Asphalt
Now, use your asphalt rake to spread the material evenly across the surface. Make sure you’re applying consistent pressure and keeping the thickness uniform, especially when spreading it along the butt joints.
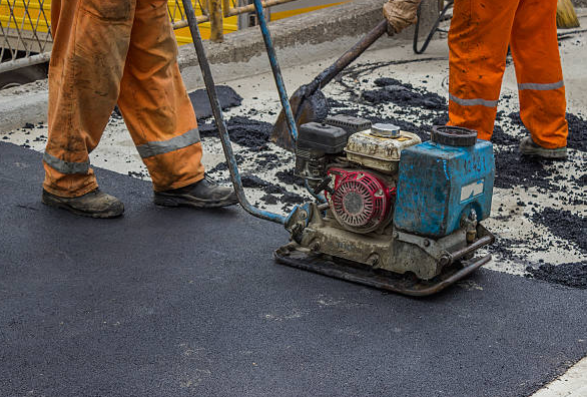
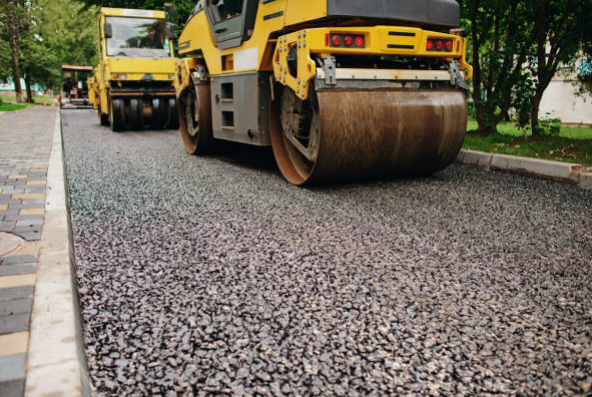
3. Compacting the Asphalt
Lastly, it’s time to compact the asphalt. You’ll need a mechanical roller for this. The goal is to firm up the asphalt, eliminating any air pockets and ensuring a solid, durable finish.
If you’ve followed these steps, you should end up with a smoothly finished surface. Remember, applying asphalt isn’t a race. It’s a process that requires patience and precision. Doing it correctly will guarantee a long-lasting, high-quality result.
Techniques for Smoothing Asphalt
In the process of laying asphalt, it’s crucial that you’re aware of effective techniques for smoothing out the material to ensure a level and durable surface.
One key technique is using an asphalt paving machine or asphalt paver, which helps you evenly distribute and flatten the asphalt pavement. Ensure you’re using a high-quality machine and check that it’s in good condition. You don’t want a faulty machine causing uneven surfaces. Remember, consistency is vital. Make sure you’re laying the asphalt at a consistent thickness across the entire surface of the asphalt driveway.
Next, you should use a roller to further smooth out and compact the asphalt. You can start by using a vibratory roller for initial compaction, then switch to a static roller to finish off the job. These rollers compress the asphalt, eliminating any air pockets and creating a smooth, solid surface.
Finally, pay attention to timing. Asphalt cools rapidly, so you need to work quickly. As soon as the asphalt is laid, start smoothing it out. Don’t forget to re-check the surface for any inconsistencies afterward.
With these steps, you’re well on your way to a smooth, professional-looking asphalt surface.
Curing and Maintenance of New Asphalt
Once you’ve laid down your new asphalt, it’s crucial to give it time for proper curing and ongoing maintenance. Curing will solidify the asphalt and make it more durable to withstand any future wear and tear. This process can take up to 30 days depending on the weather and the thickness of the asphalt.
As for maintenance, there are three key steps you should follow to ensure durability and in top condition always:
1. Regular Cleaning
Keep your asphalt clean from dirt, leaves, and other debris. This not only keeps it looking fresh but also prevents any potential damage.
2. Sealcoating
This is done every 2-3 years and helps protect the asphalt from the elements, such as UV rays and rain. It also gives it a nice, smooth finish.
3. Prompt Repair
If you notice any cracks or potholes, repair them immediately. This prevents further damage and maintains the integrity of your asphalt.
Common Mistakes to Avoid When Laying Asphalt
Before you start laying asphalt, it’s important to understand that there are common mistakes you could make, but with the right knowledge, you can avoid them.
One of the most common mistakes isn’t preparing the base properly. It’s crucial to ensure the ground is firm, level, and dry before you begin. If not, you’ll likely end up with uneven, cracked asphalt.
Another mistake is laying the asphalt too thin. You might believe you’re saving money, but it’s a false economy. A thin layer won’t withstand heavy traffic or harsh weather conditions, leading to quicker deterioration and more frequent repairs.
You should also avoid laying asphalt in cold weather. The colder temperatures can make the asphalt harden too quickly, leading to a less durable surface. It’s best to lay asphalt when the weather is warm and dry.
Lastly, don’t rush the process. Laying asphalt requires patience and precision. Rushing can lead to bubbles in the asphalt, which will weaken the surface over time. Always take the time to lay asphalt correctly, and you’ll enjoy a durable, long-lasting surface.
If you’re in need of professional help for the proper laying of asphalt, it is advisable to consult a contractor. Asphalt is a commonly used material for pavement and driveways, and it requires specialized knowledge and expertise to ensure a smooth and durable surface.
We recommend you to contact a paving company like Productive Asphalt LLC as they can provide the necessary guidance and expertise to assess the project requirements, recommend the right type of asphalt for your specific needs, and ensure that the installation is done properly. They have the experience and equipment to handle the entire process, including preparing the site, applying the asphalt, and ensuring proper compaction. They can also remove the old asphalt, if necessary, to ensure proper installation of the fresh asphalt mix.
By consulting a contractor like Productive Asphalt LLC, you can ensure that your asphalt project is completed to the highest standards, resulting in a long-lasting and visually appealing pavement or driveway.
Conclusion
In conclusion, laying asphalt isn’t as complex as it seems. It’s about understanding the basics, having the right tools and materials, proper surface preparation, correct application, and smoothing techniques.
Don’t forget the importance of curing and maintenance, plus avoiding common mistakes. With this knowledge, you’re well-equipped to tackle your asphalt project.
Remember, practice makes perfect, so don’t be afraid to take on this challenging yet rewarding task.